Ah, the power of a thousand pores.
Sometimes, that is just what a porosity/inclusion analysis (PIA) gives you. But nobody wants data on a thousand pores; normally, we just need to inspect the largest ten, or the most voluminous five, to make sure the part will run smoothly.
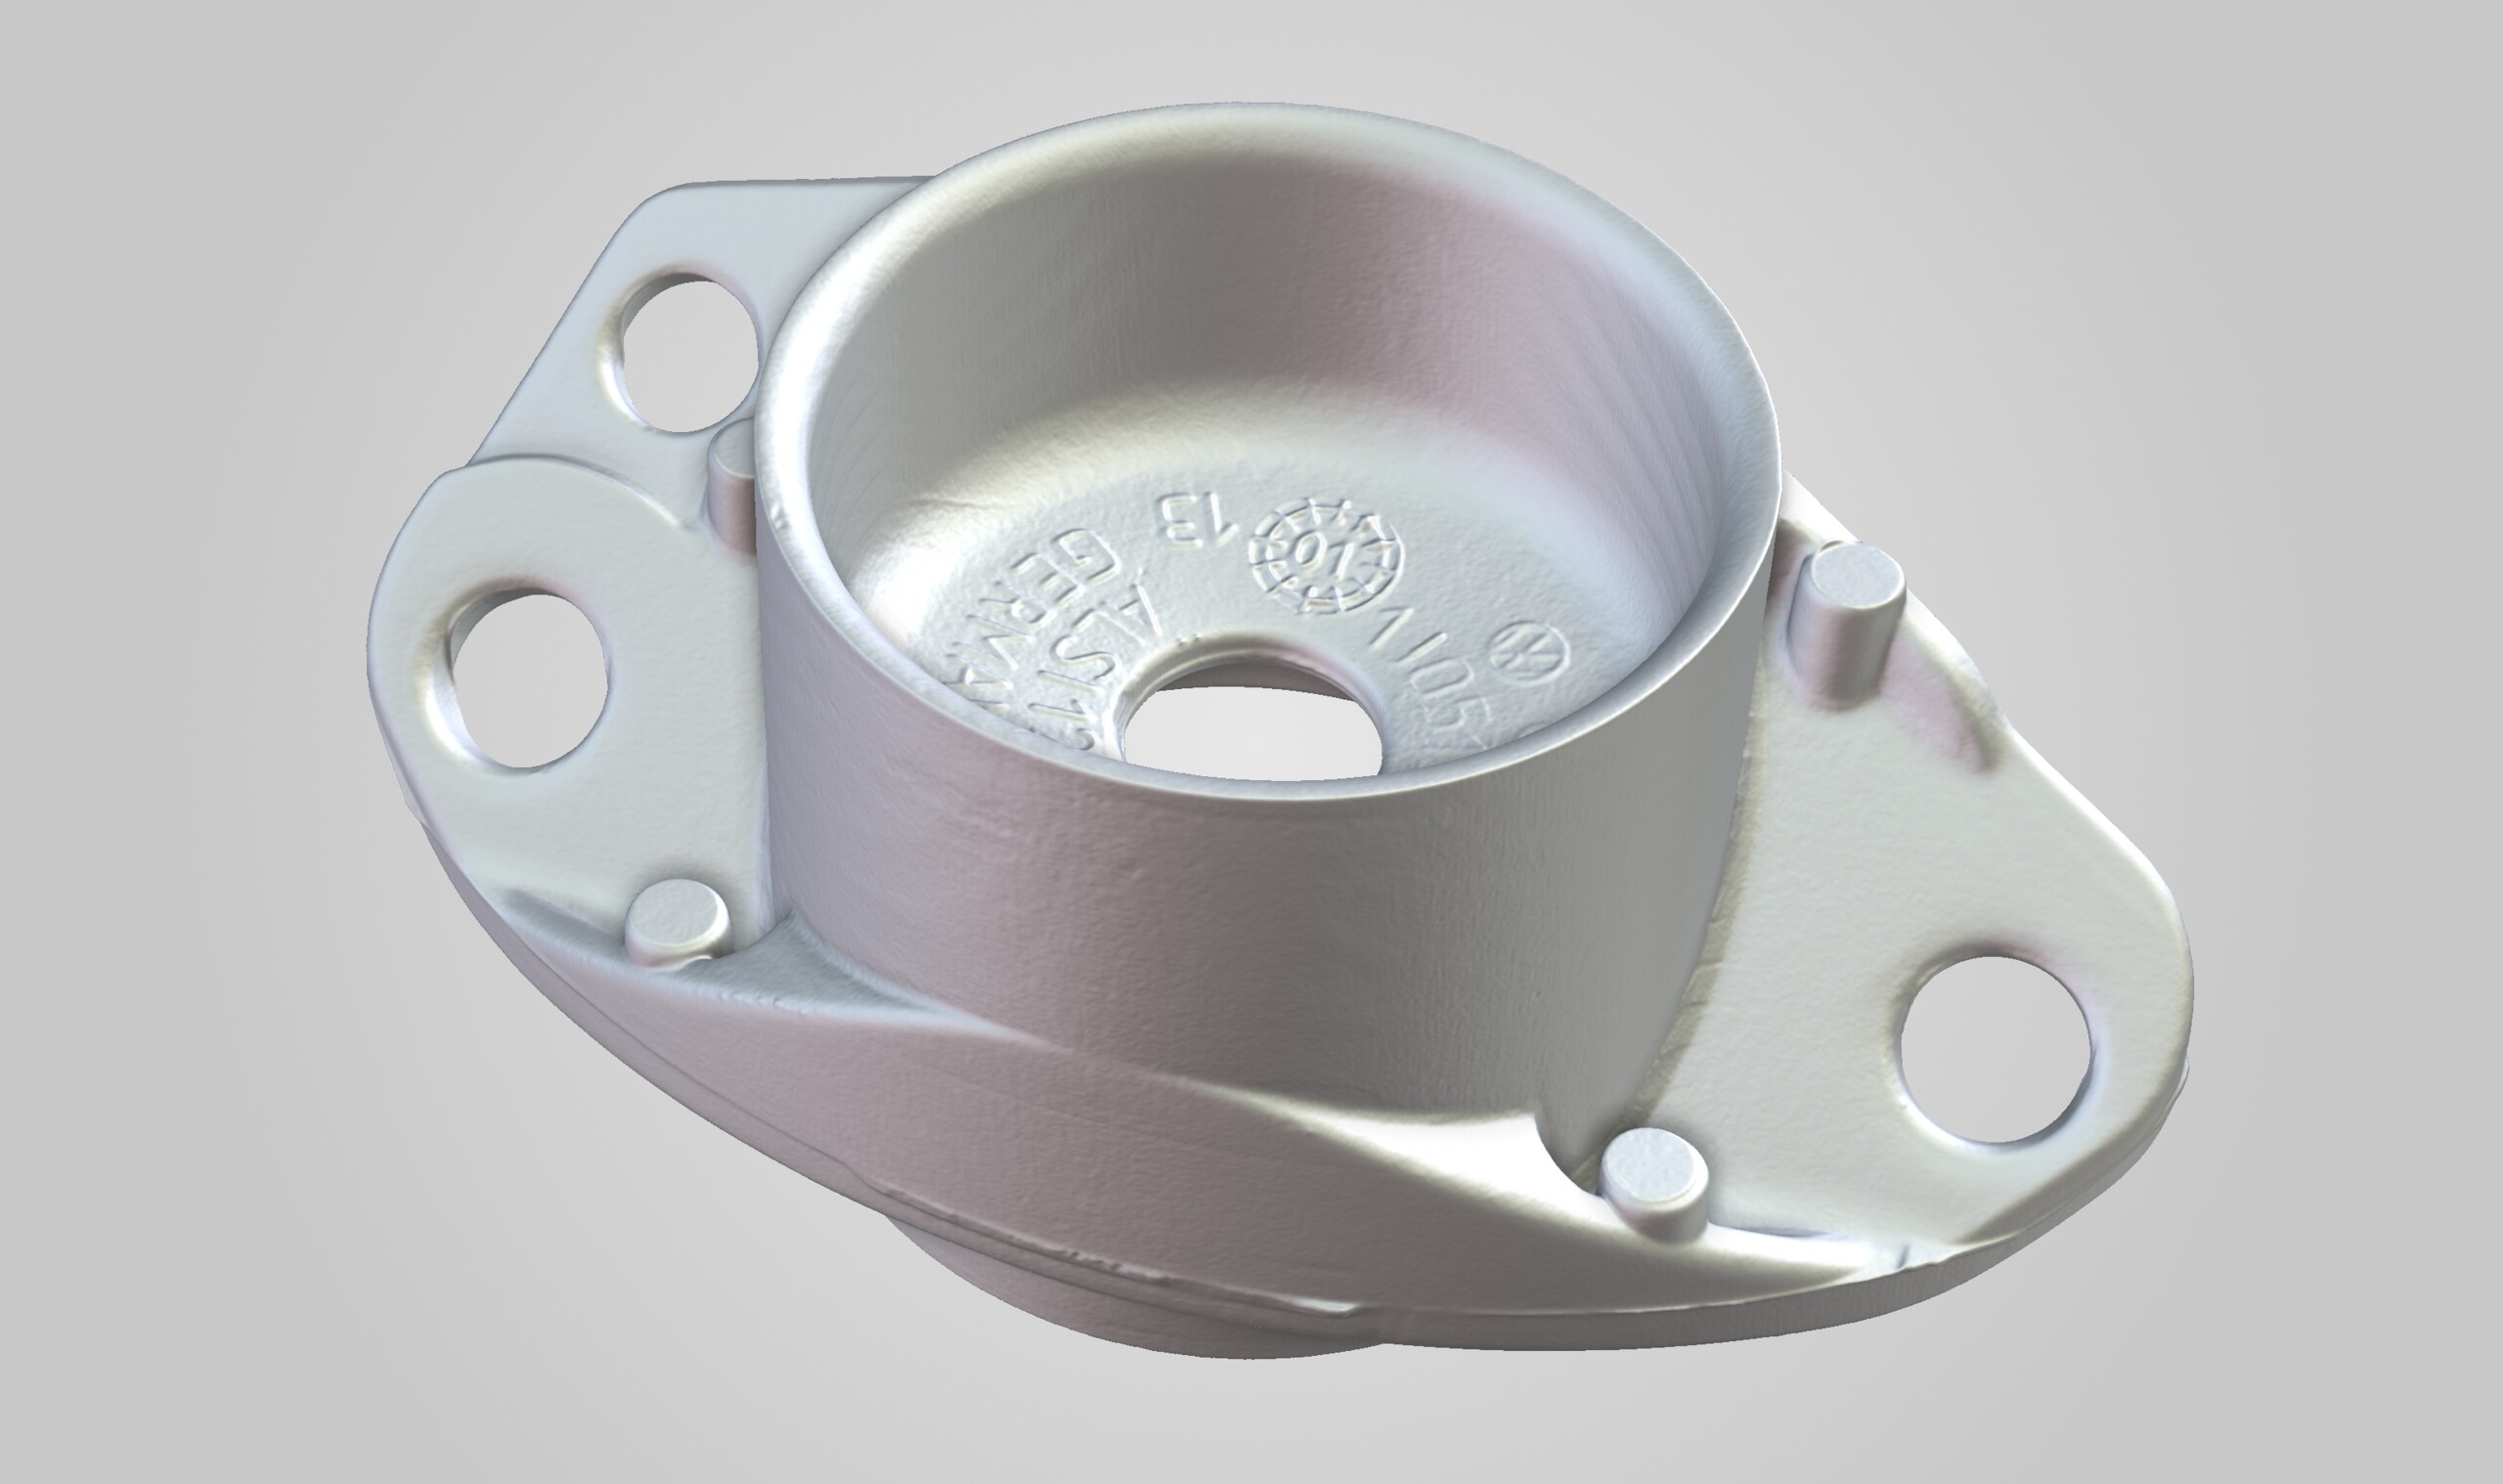
Let's take a look at our strut mount: the component that attaches the suspension strut to the vehicle. For such a small part, it goes through a lot of wear and tear, cushioning the ups and downs of a bumpy ride. We want to make sure it lasts a long time; however, we also want to make sure reading the report doesn't. The question is, how can we get all the info we need in a (and user-friendly) nutshell?
The answer is simple: rule-based annotations!
Let's start by running a quick PIA. In some cases, we need all the pores—big and small—like when we need to determine and tolerate the overall defect volume ratio of the part.
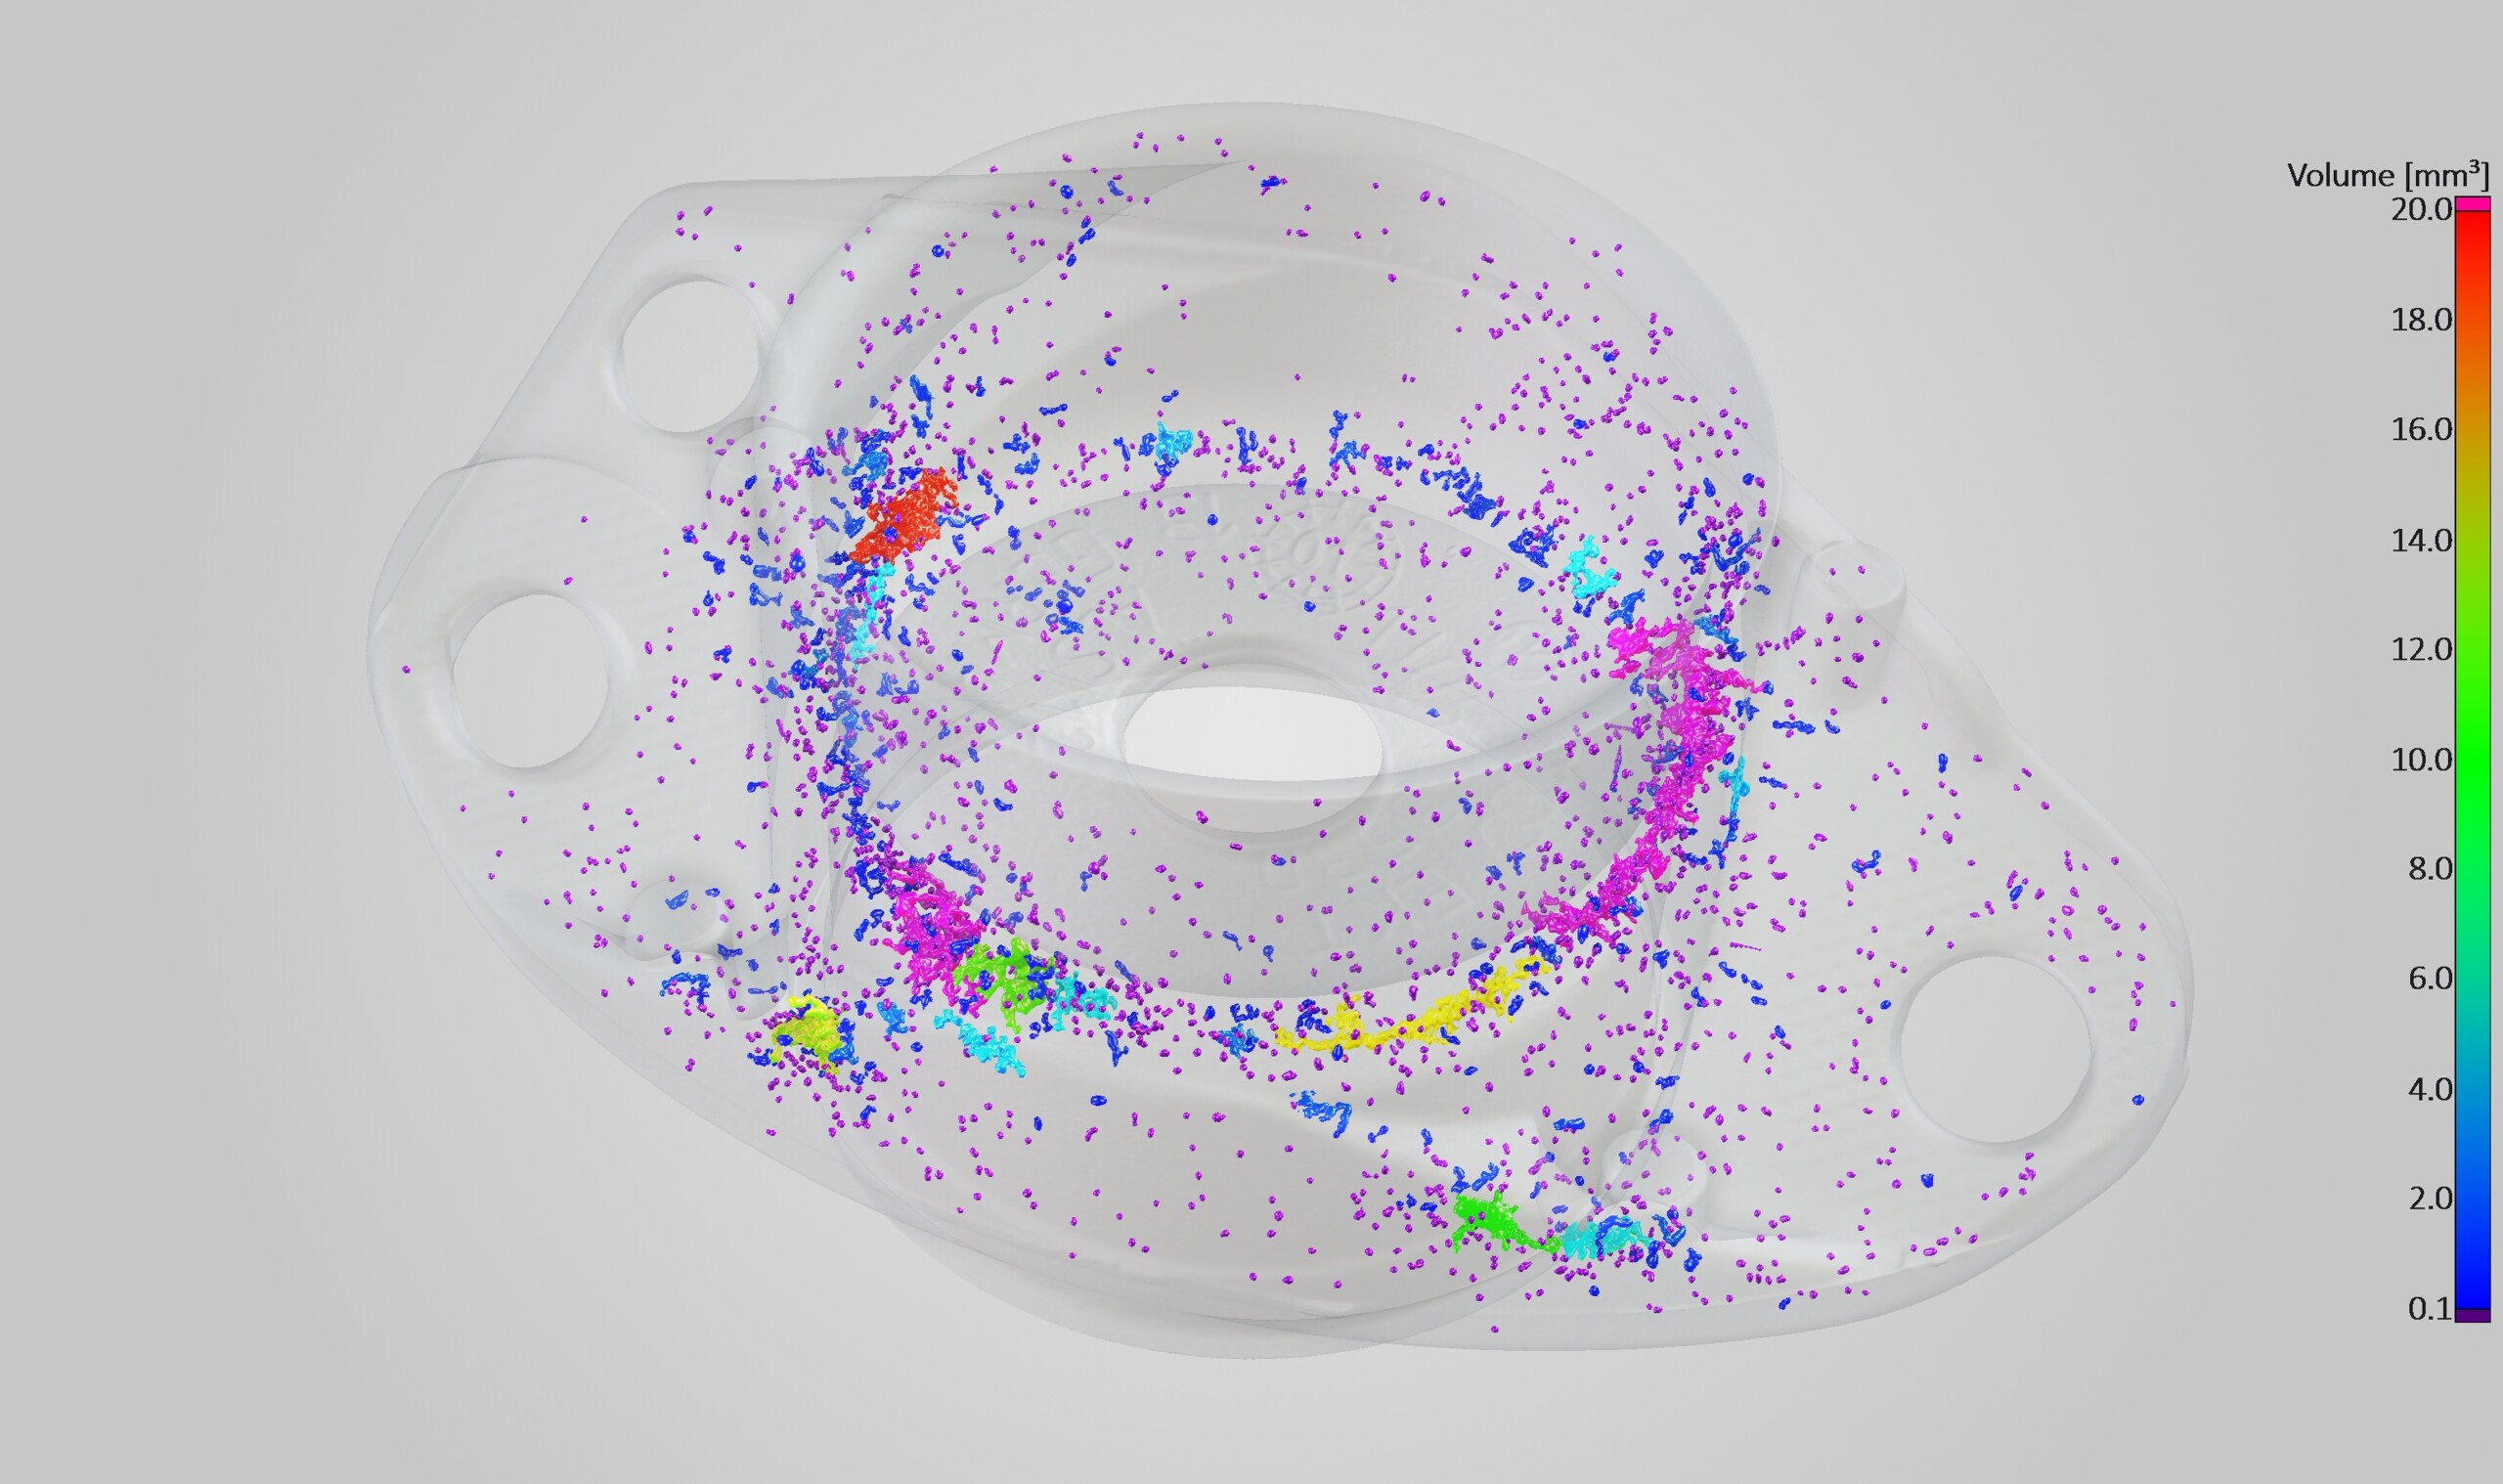
So many pores, so little time. A quick PIA shows over 2000 pores smaller than 0.1 mm³
Of course, we have just taken into consideration hundreds of tiny pores, but it may be of interest to take a look at the biggest of them all. But how can we get the correct defect volume ratio (which is calculated based on overall porosity) but only including the largest pores in one bite-sized report? And more importantly, how do we set a limit to the number of results?
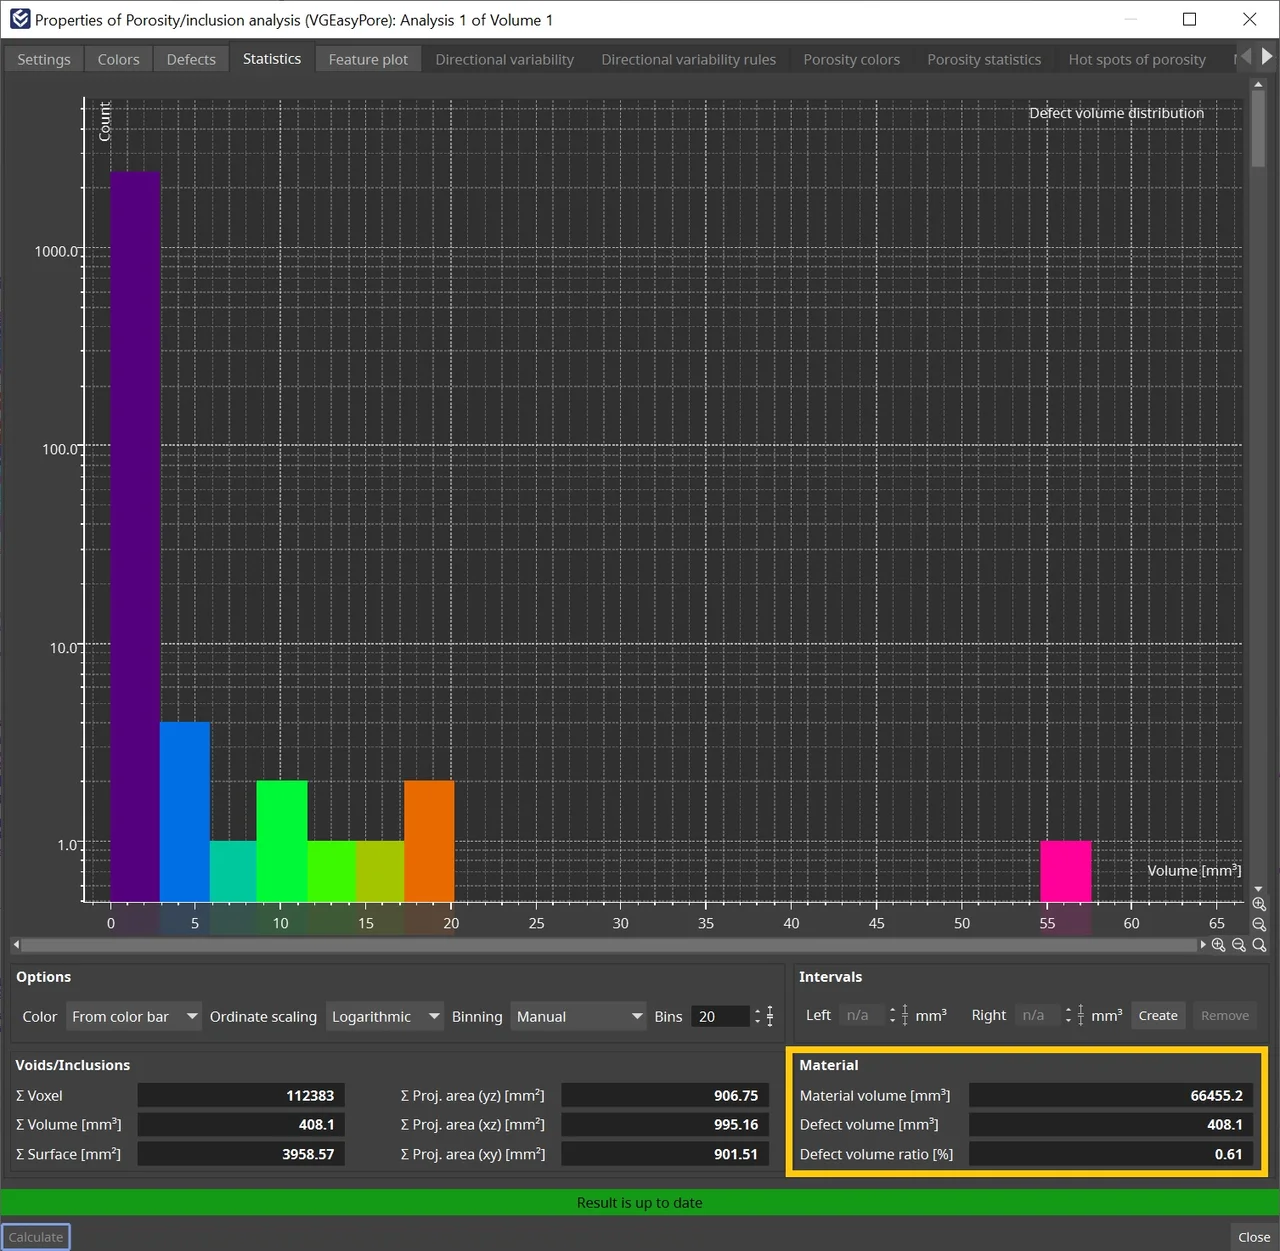
The statistics tab shows material volume, defect volume, and defect volume ratio
Best of Both Worlds
Rules allow us to set a threshold for rule-based annotations. Using one of the properties, you can generate annotations for results larger or smaller than this threshold. For example, creating annotations for pores larger than 2 mm³ results in 14 annotated pores, which is immediately indicated in the dialog.
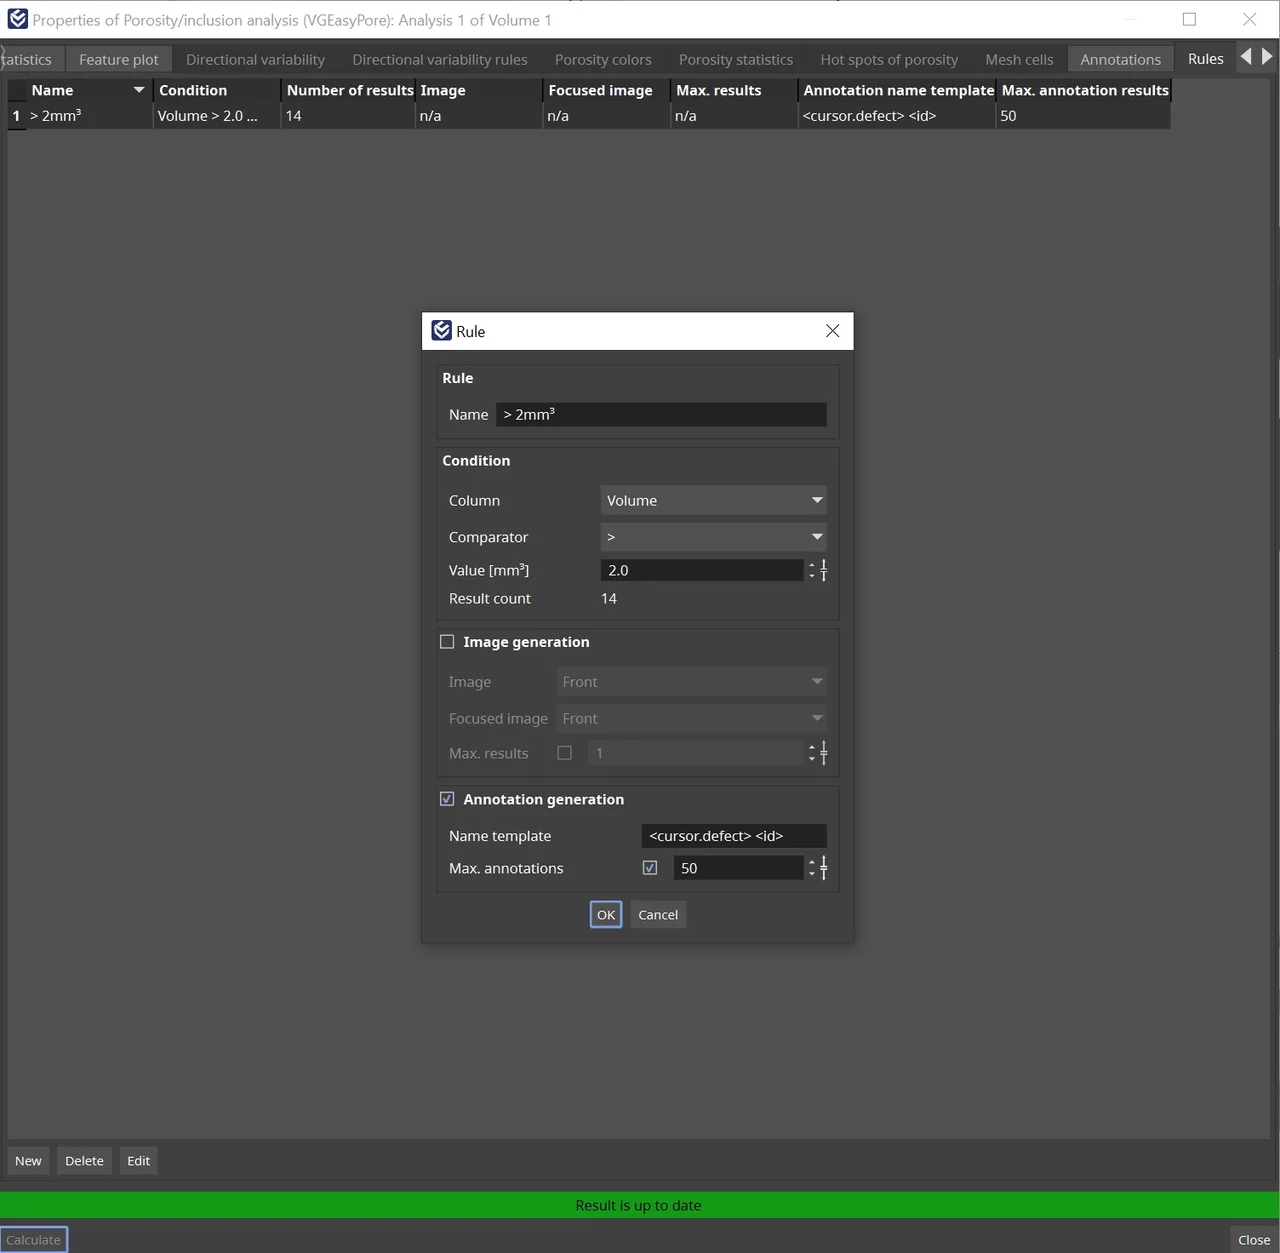
You can set rules and limit the number of annotations in the rule dialog.
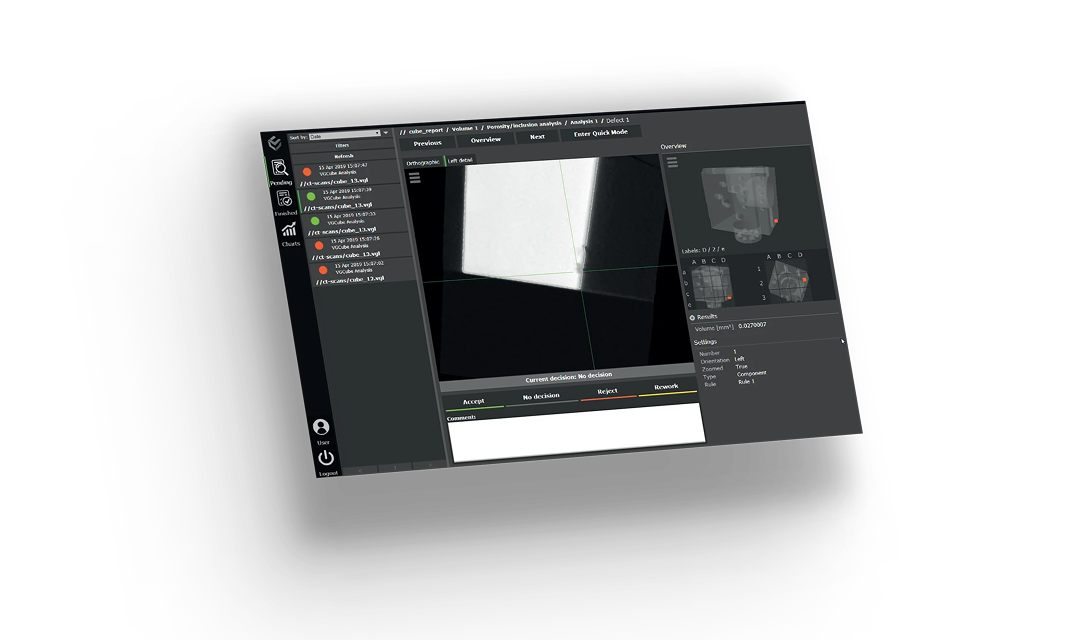
Here's how the report looks: clean, crisp, and to-the-point.
Using rule-based annotations reduced the size of the report to only 18 pages—imagine if we had included every pore!
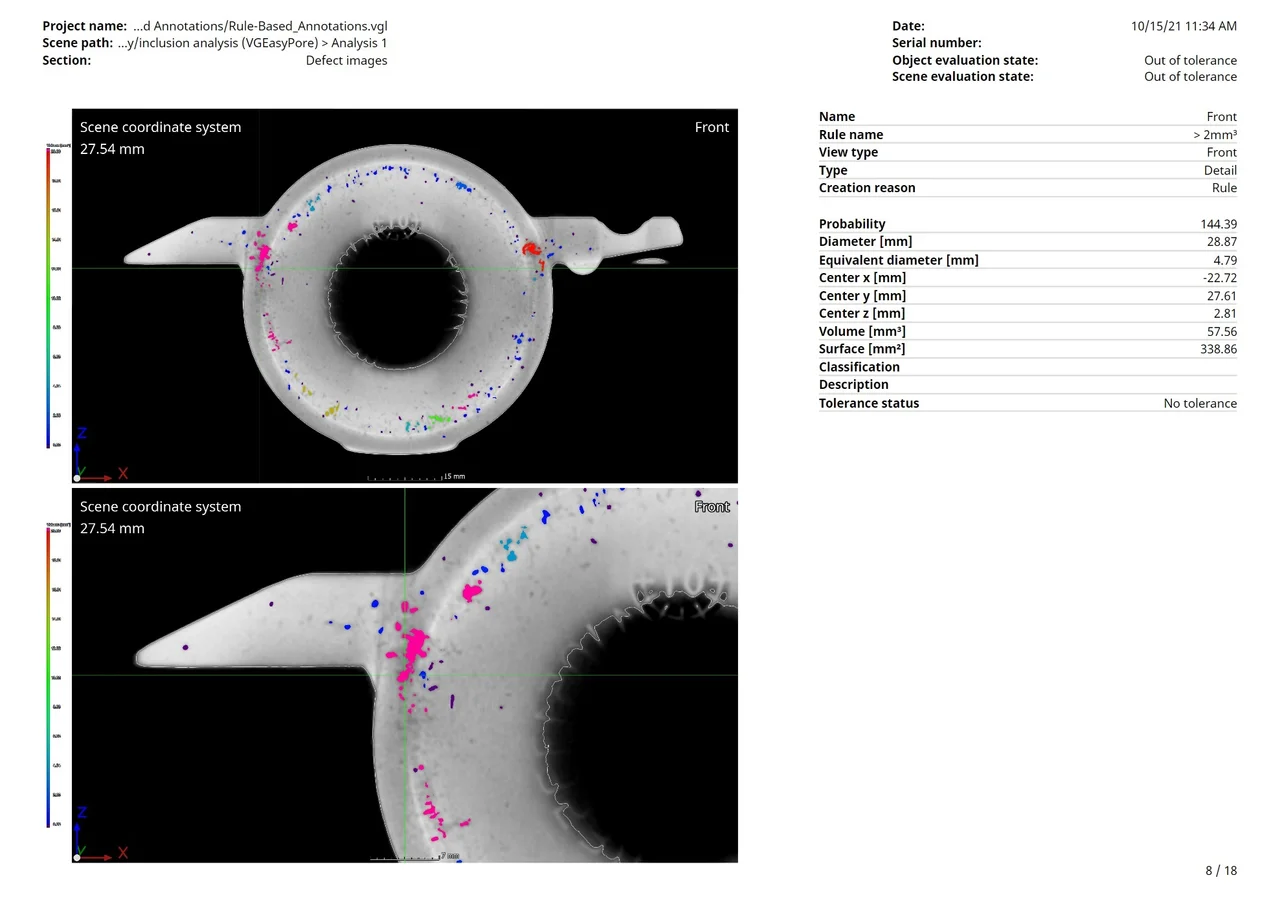
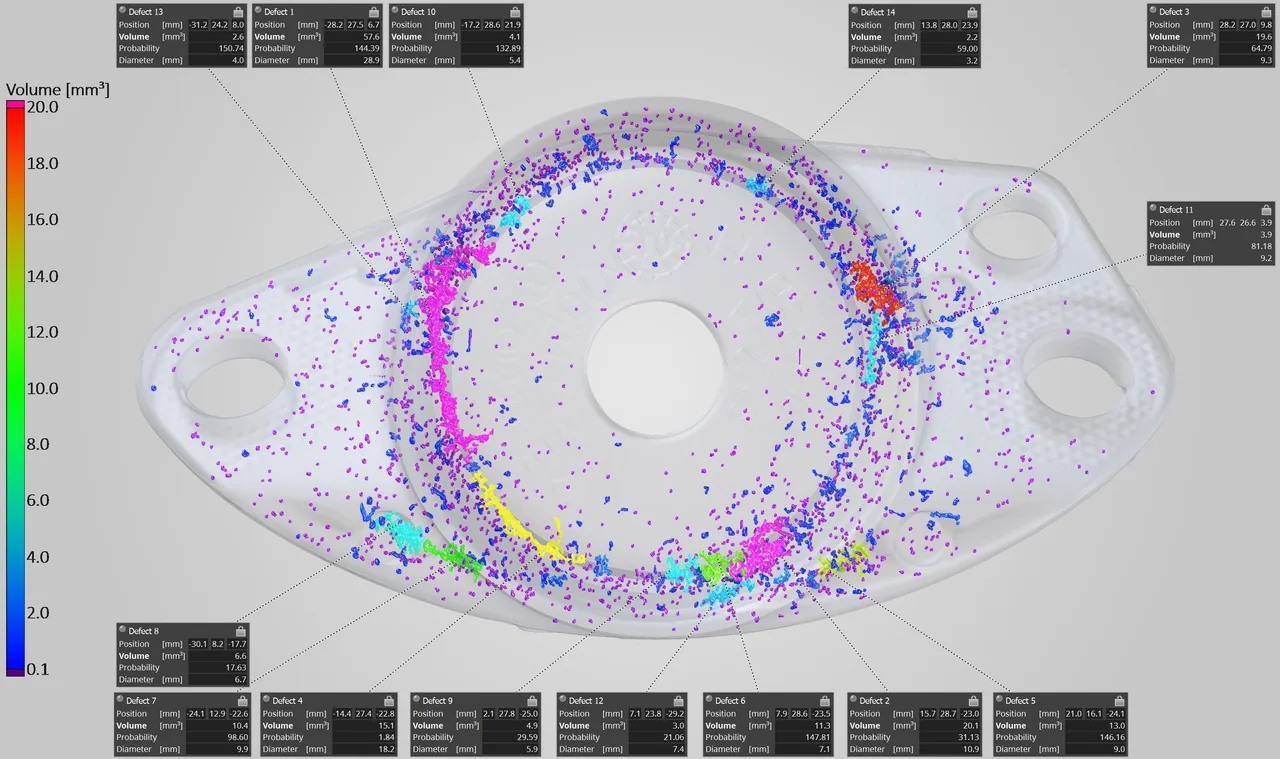
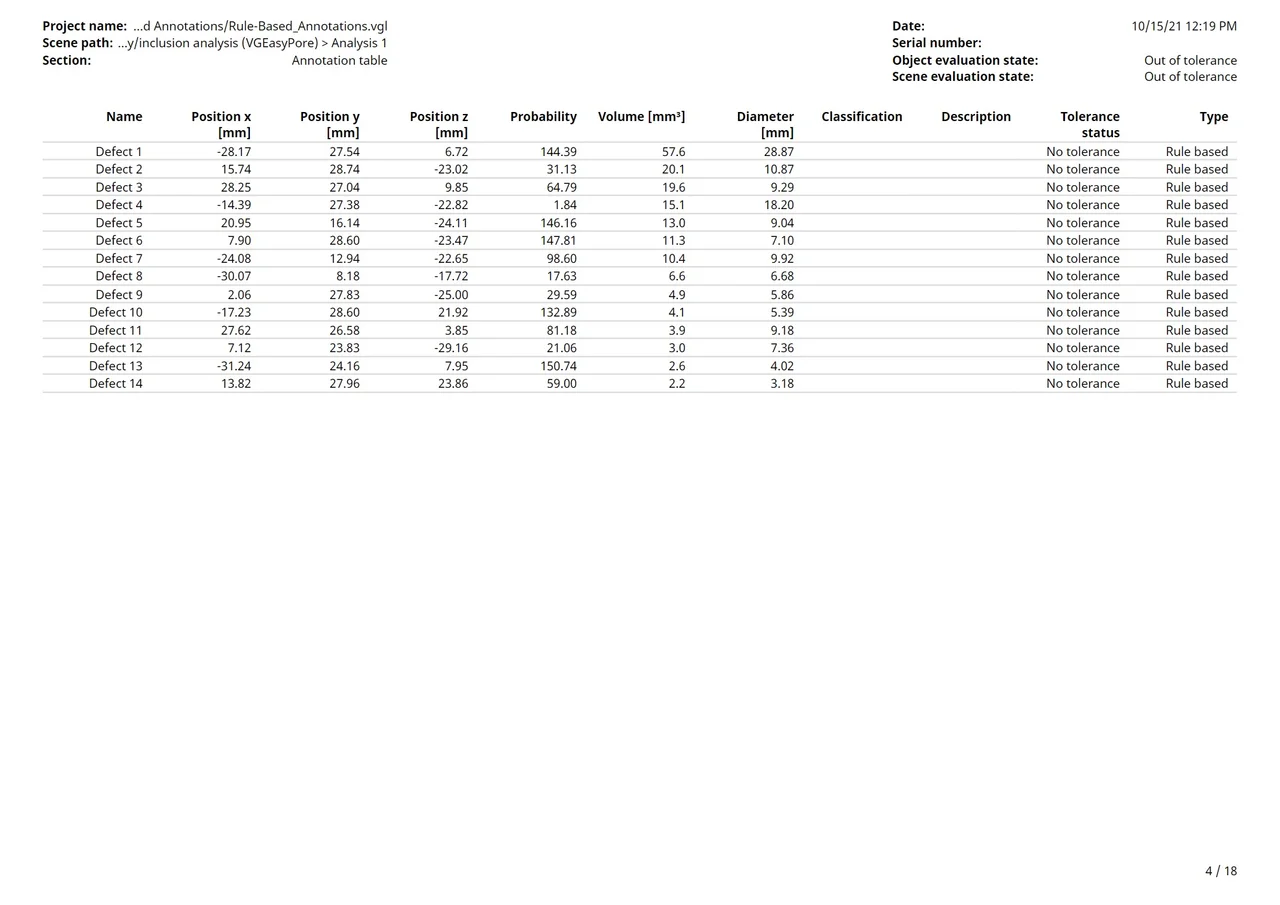
Annotations of all 14 pores larger than 2 mm³ in the 3D view
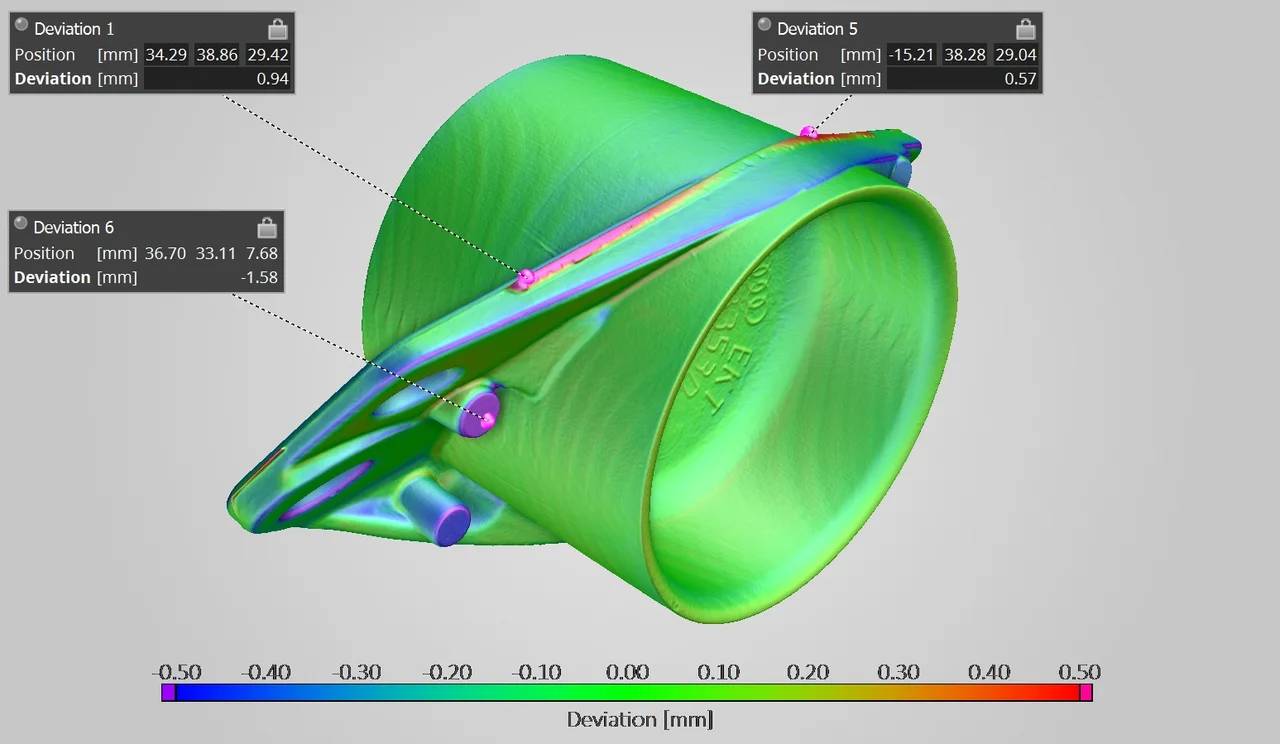
Let's try out other analyses. Since our strut mount comes with a CAD file, we can run a nominal/actual comparison (NAC) to calculate the maximum deviations in the physical part. In this case, let's create a rule for 5 maximum positive—and 5 maximum negative—deviations.
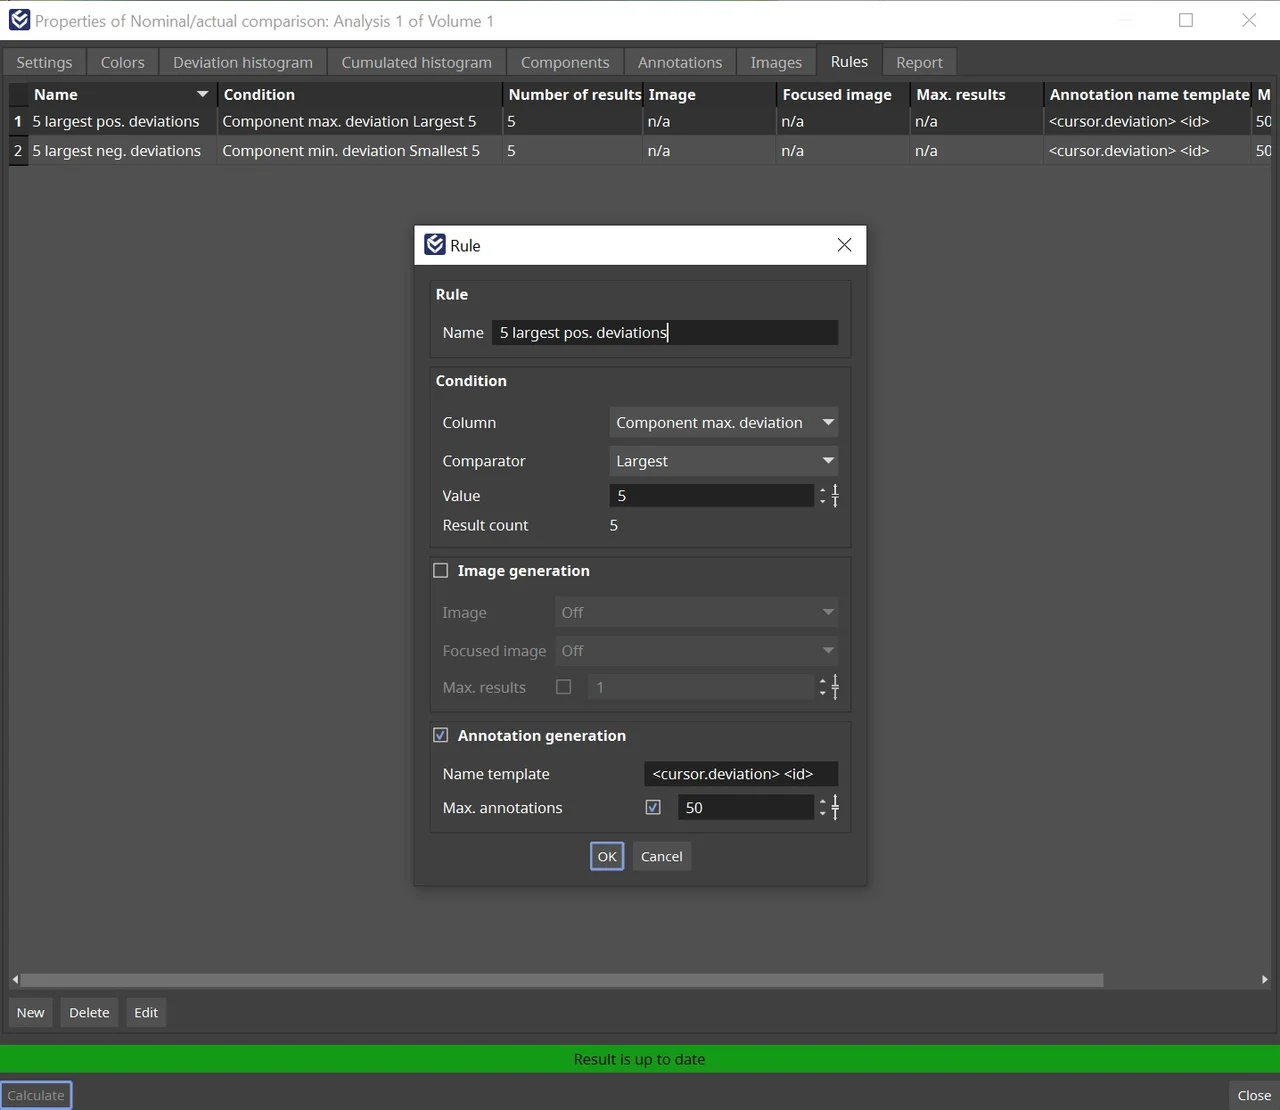
Just change the settings on the "rule" dialog
Rinse and repeat…
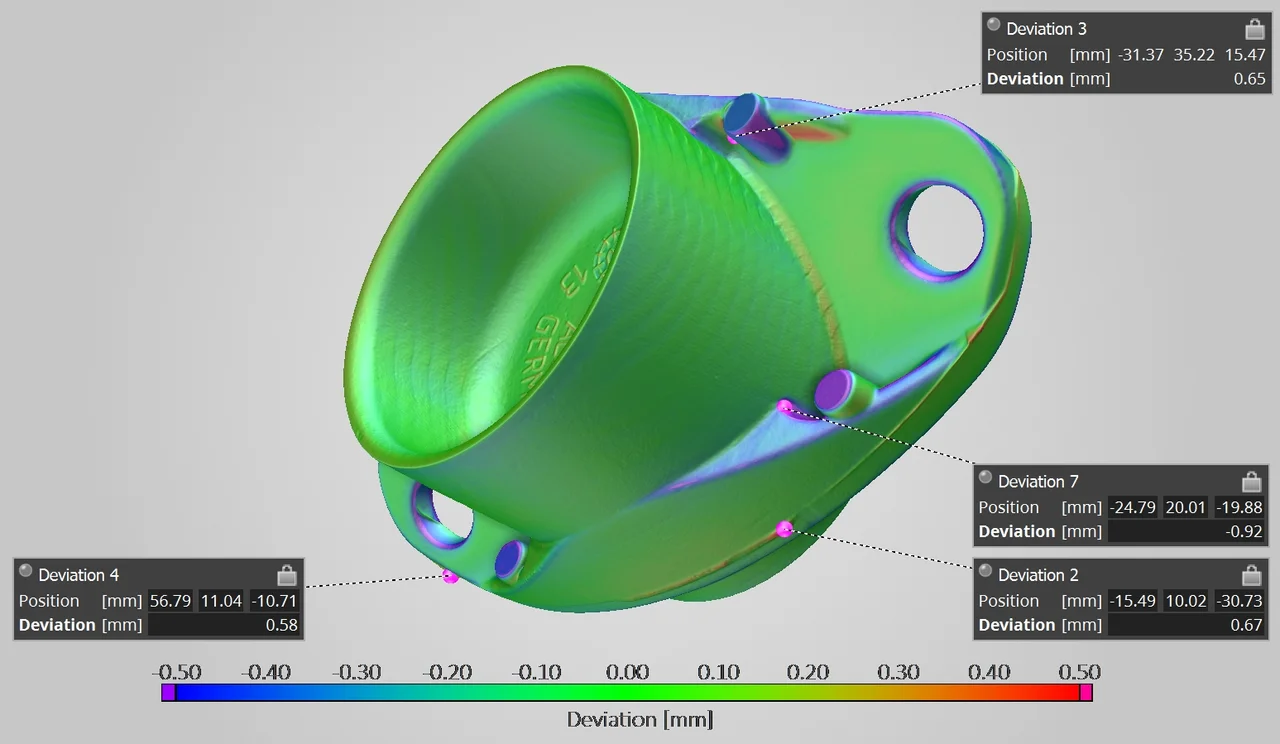

Different angles of the strut mount, so we can clearly see the maximum positive and maximum negative deviations
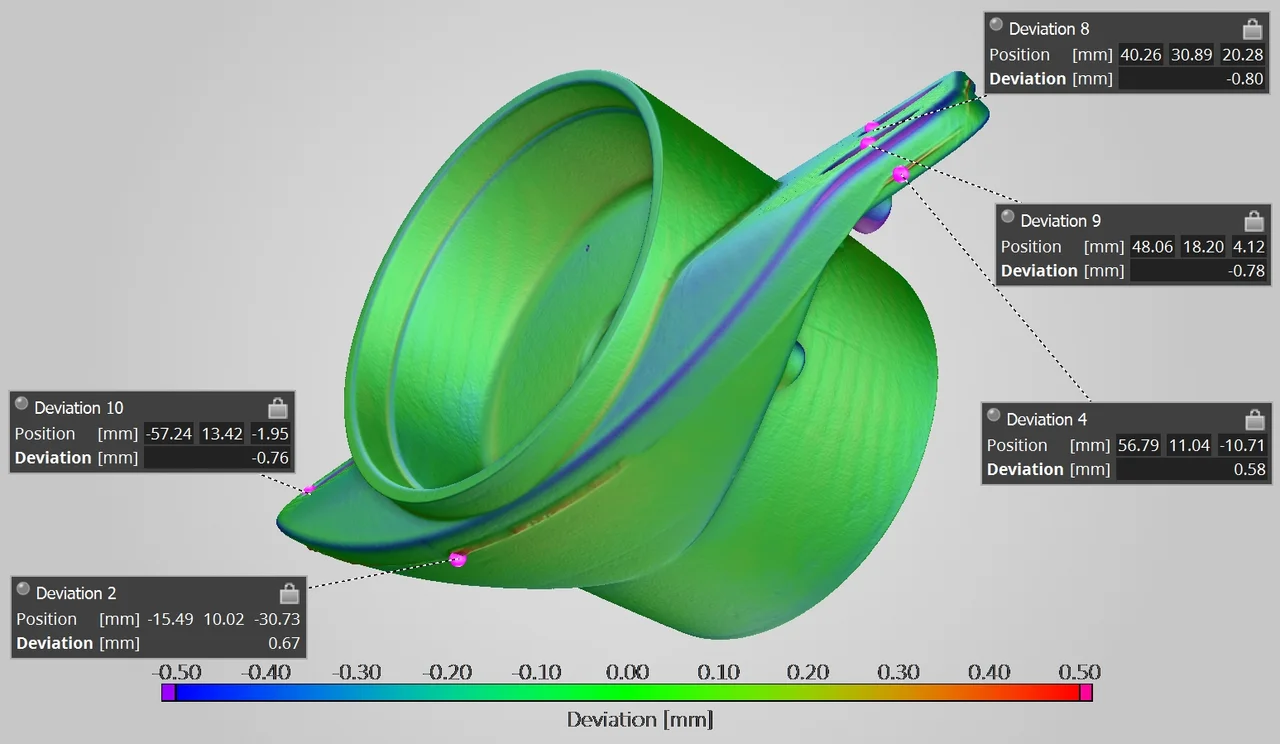
And there you have it! All the info you need at a glance.
Rule-based annotations are handy for compiling quick, bite-sized information. Perfect for a Friday afternoon.
Sometimes, we can actually end up with too many annotations.
They clutter the workspace and overlap each other. There is an
easy way to clean up the mess, though.
Simply right-click in a window, click "annotations," and arrange.
To minimize all of them, just click "minimize." Now it is much better!

One click to rule them all: arranging, minimizing, and maximizing annotations

evolution of Hairpin Inspection")