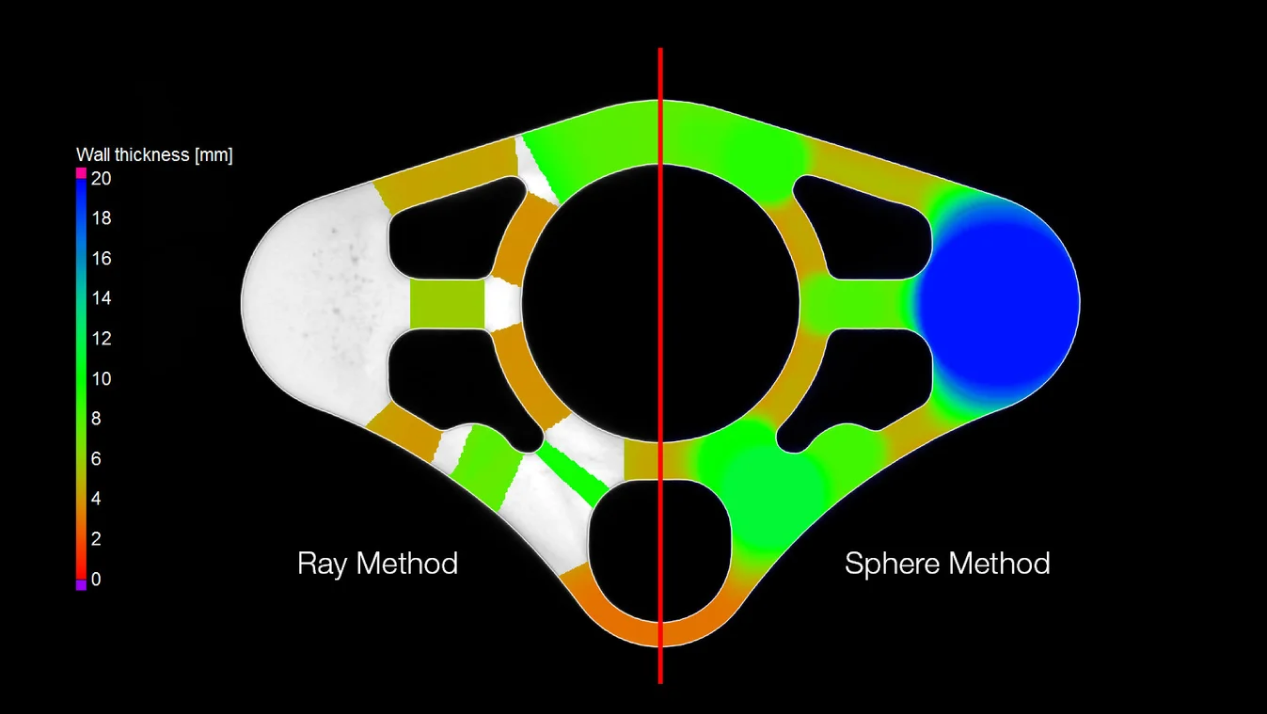
Perform volumetric analyses of a part’s thickness quickly and automatically—either using the ray method for parts with simple shapes or the sphere method for more organic shapes, including complex 3D printed parts. Colour-coded results help you localise areas with an insufficient or excessive wall thickness or gap width within the voxel, point cloud, mesh, or CAD data set.
This module:
- Automatically and quickly analyses the wall thickness. *
- Offers two different, dedicated methods for cubic and organic parts, respectively:
- For parts with nearly parallel surfaces, the ray-based method yields the best results.
- For organic, curved, or even branching surfaces, the sphere method is preferable, especially for complex 3D-printed shapes that are topology-optimised, generatively designed, or even lattice structures.
- Automatically and directly locates areas with insufficient or excessive wall thickness or gap width within voxel, point cloud, mesh, or CAD data sets.
- Allows the application of tolerances with various parameters, such as thickness (minimum, maximum, mean, and deviation).
- Reduces the number of false detections with a noise filter, which is especially helpful for automated inspections.
* Use in combination with Coordinate Measurement module recommended

ADD-ON MODULES
Ready to expand your capabilities?
Contact us today—our team is ready to assist!
Request a quote
